Forest’s play room is still a work in progress. It’s such
blank slate that I almost didn’t know where to begin or which direction to go
in.

In the end we kind of decided to make it into a little school-room-esque
space with plenty of space for building, creating and getting lost in his
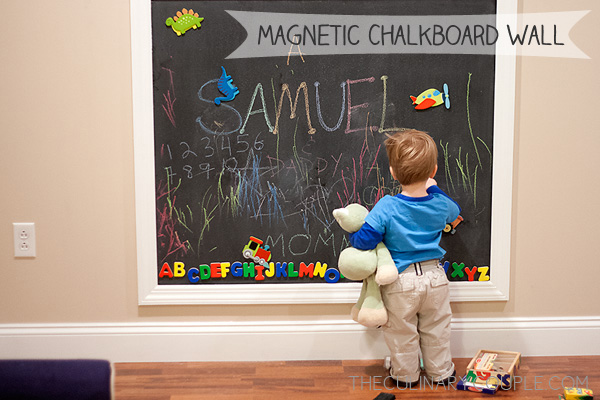
imagination. One feature I knew I wanted was a magnetic chalkboard wall.

I
looked around Pinterest and found some pretty straight forward instructions on
this blog and I sent Jon to work on it (one of the perks of 28/28 lifestyle…ha!).
 |
| SOURCE |
First we started with two coats of Rust-Oleum magnetic paint but we were finding that
the magnets weren’t sticking very well.

After some research I realized that a
big complaint regarding magnetic paint is how weak the charge is and you
usually need at least 6 coats of paint, especially if you plan on painting
anything over it (like chalkboard paint). Gulp. Especially since the paint is
so thick that it requires quite a lot of shaking/mixing before each use and
then takes quite a bit of time to dry before another coat can be applied.
Finding 30 minute increments of uninterrupted time with a curious toddler
running around is not easy to do.


So this part of the process ended up taking 3
days because of having to paint 6 separate coats (plus running to Home Depot
for a second helping of paint) and letting them dry in between. Then we
Jonathan painted 2 coats of chalk paint over the wall. But we still weren’t
ready for play-time yet!
After the chalk paint is done you are supposed to wait
4 days and then coat the wall with a thin layer of chalk and then rub it in
with a dry paper towel, erase it, and wipe it down pretty vigorously with a
microfiber cloth before using it regularly.


Holy bicep workout, y’all. And holy vacuuming, moping, and dusting afterward.
I love the way it turned out but if I had read the fine print I probably would have done this project instead which is basically just chalk painting over a magnetic oil pan (the kind you put under a car) and hanging it on the wall:

Magnetic paint was kind of a huge disappointment and even after 6 coats it
STILL isn’t that strong of a hold and the magnets often fall when Forest moves
them around. Our little man doesn’t know any different though and he is pretty
obsessed with his new wall.

We still haven’t let him go nuts with the chalk yet
because another fine-print factor I didn’t think about is sending a 2 year old
the message that it’s ok to write on walls…He’s pretty good about knowing his
boundaries but since he just took a red crayon to his train set I think we’ll
leave the chalkboard feature of this wall until a later date.
We also plan on
installing a little shelf near the bottom to hold chalk and erasers and to catch
some of the chalk dust before it hits the floor. Also I bought some gorgeous alphabet art cards that I plan to hang as bunting at the top.
So, yea, I love it and I'm glad it's done but this taught me that Jon and I are really not DIYers. Next time I will totally just buy a magnetic chalkboard, hang it on the wall and call it a day!
You still get an A for effort! Good to know that the paint is not worth the try. I've been debating on whether to do something similar for the kids.
ReplyDelete